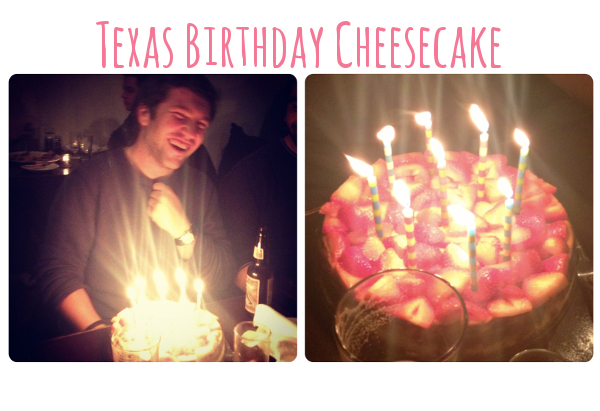
 Cheesecake was far and above my favorite dessert when I was growing up & I was lucky enough to live right next door to the best cheesecake baker in all the land. My neighbor baked her delicious cheesecakes for a handful of Houston restaurants by the dozen, and was always quick to share samples of new flavors or the very rare cratered cake that was still scrumptious but wouldn’t win a beauty contest when plated at the restaurant. Elizabeth’s cheesecake is and always will be my gold standard, but miles and miles away from the expert I attempted my own and it came out better than I could have ever imagined! The impetus for this particular baking extravaganza was Boston Boy’s surprise birthday party. You see, Boston Boy doesn’t like sweets as much as this Hungry Texan, but he always says if he had to pick a favorite dessert it’d probably be cheesecake; and with that resounding enthusiasm who wouldn’t want to humor his tastebuds!
Cheesecake has always been super intimidating to me (you read about water baths and thermometers…stressful!), but this recipe is all things considered pretty “set it and forget it”. After texting with the expert, I also learned a couple of tricks that helped alleviate some of my fears!
- Make your cheesecake a few days early if you can! I made mine Wednesday evening for Friday evening and it was delicious after a few days of rest in the fridge.
- Once your cheesecake seems solidly cooked (the inside can & should be a little jiggly), turn off your oven and let the cheesecake cool in an oven whose temperature is very slowly decreasing opposed to the volatile elements of your kitchen. The slower your cake cools, the less likely it is to crack or crater!
To recreate this Texas cheesecake (that admittedly isn’t the most-Texas, but these HungryTexans couldn’t flaunt a “New York” cheesecake!), you’ll need:
For the crust:
8 graham crackers pulverized to crumbs in your food processor
2 tbl butter melted, plus additional for the crust

For the filling:
4 1/2 packages of cream cheese
1 cup sour cream
2 tbl lemon
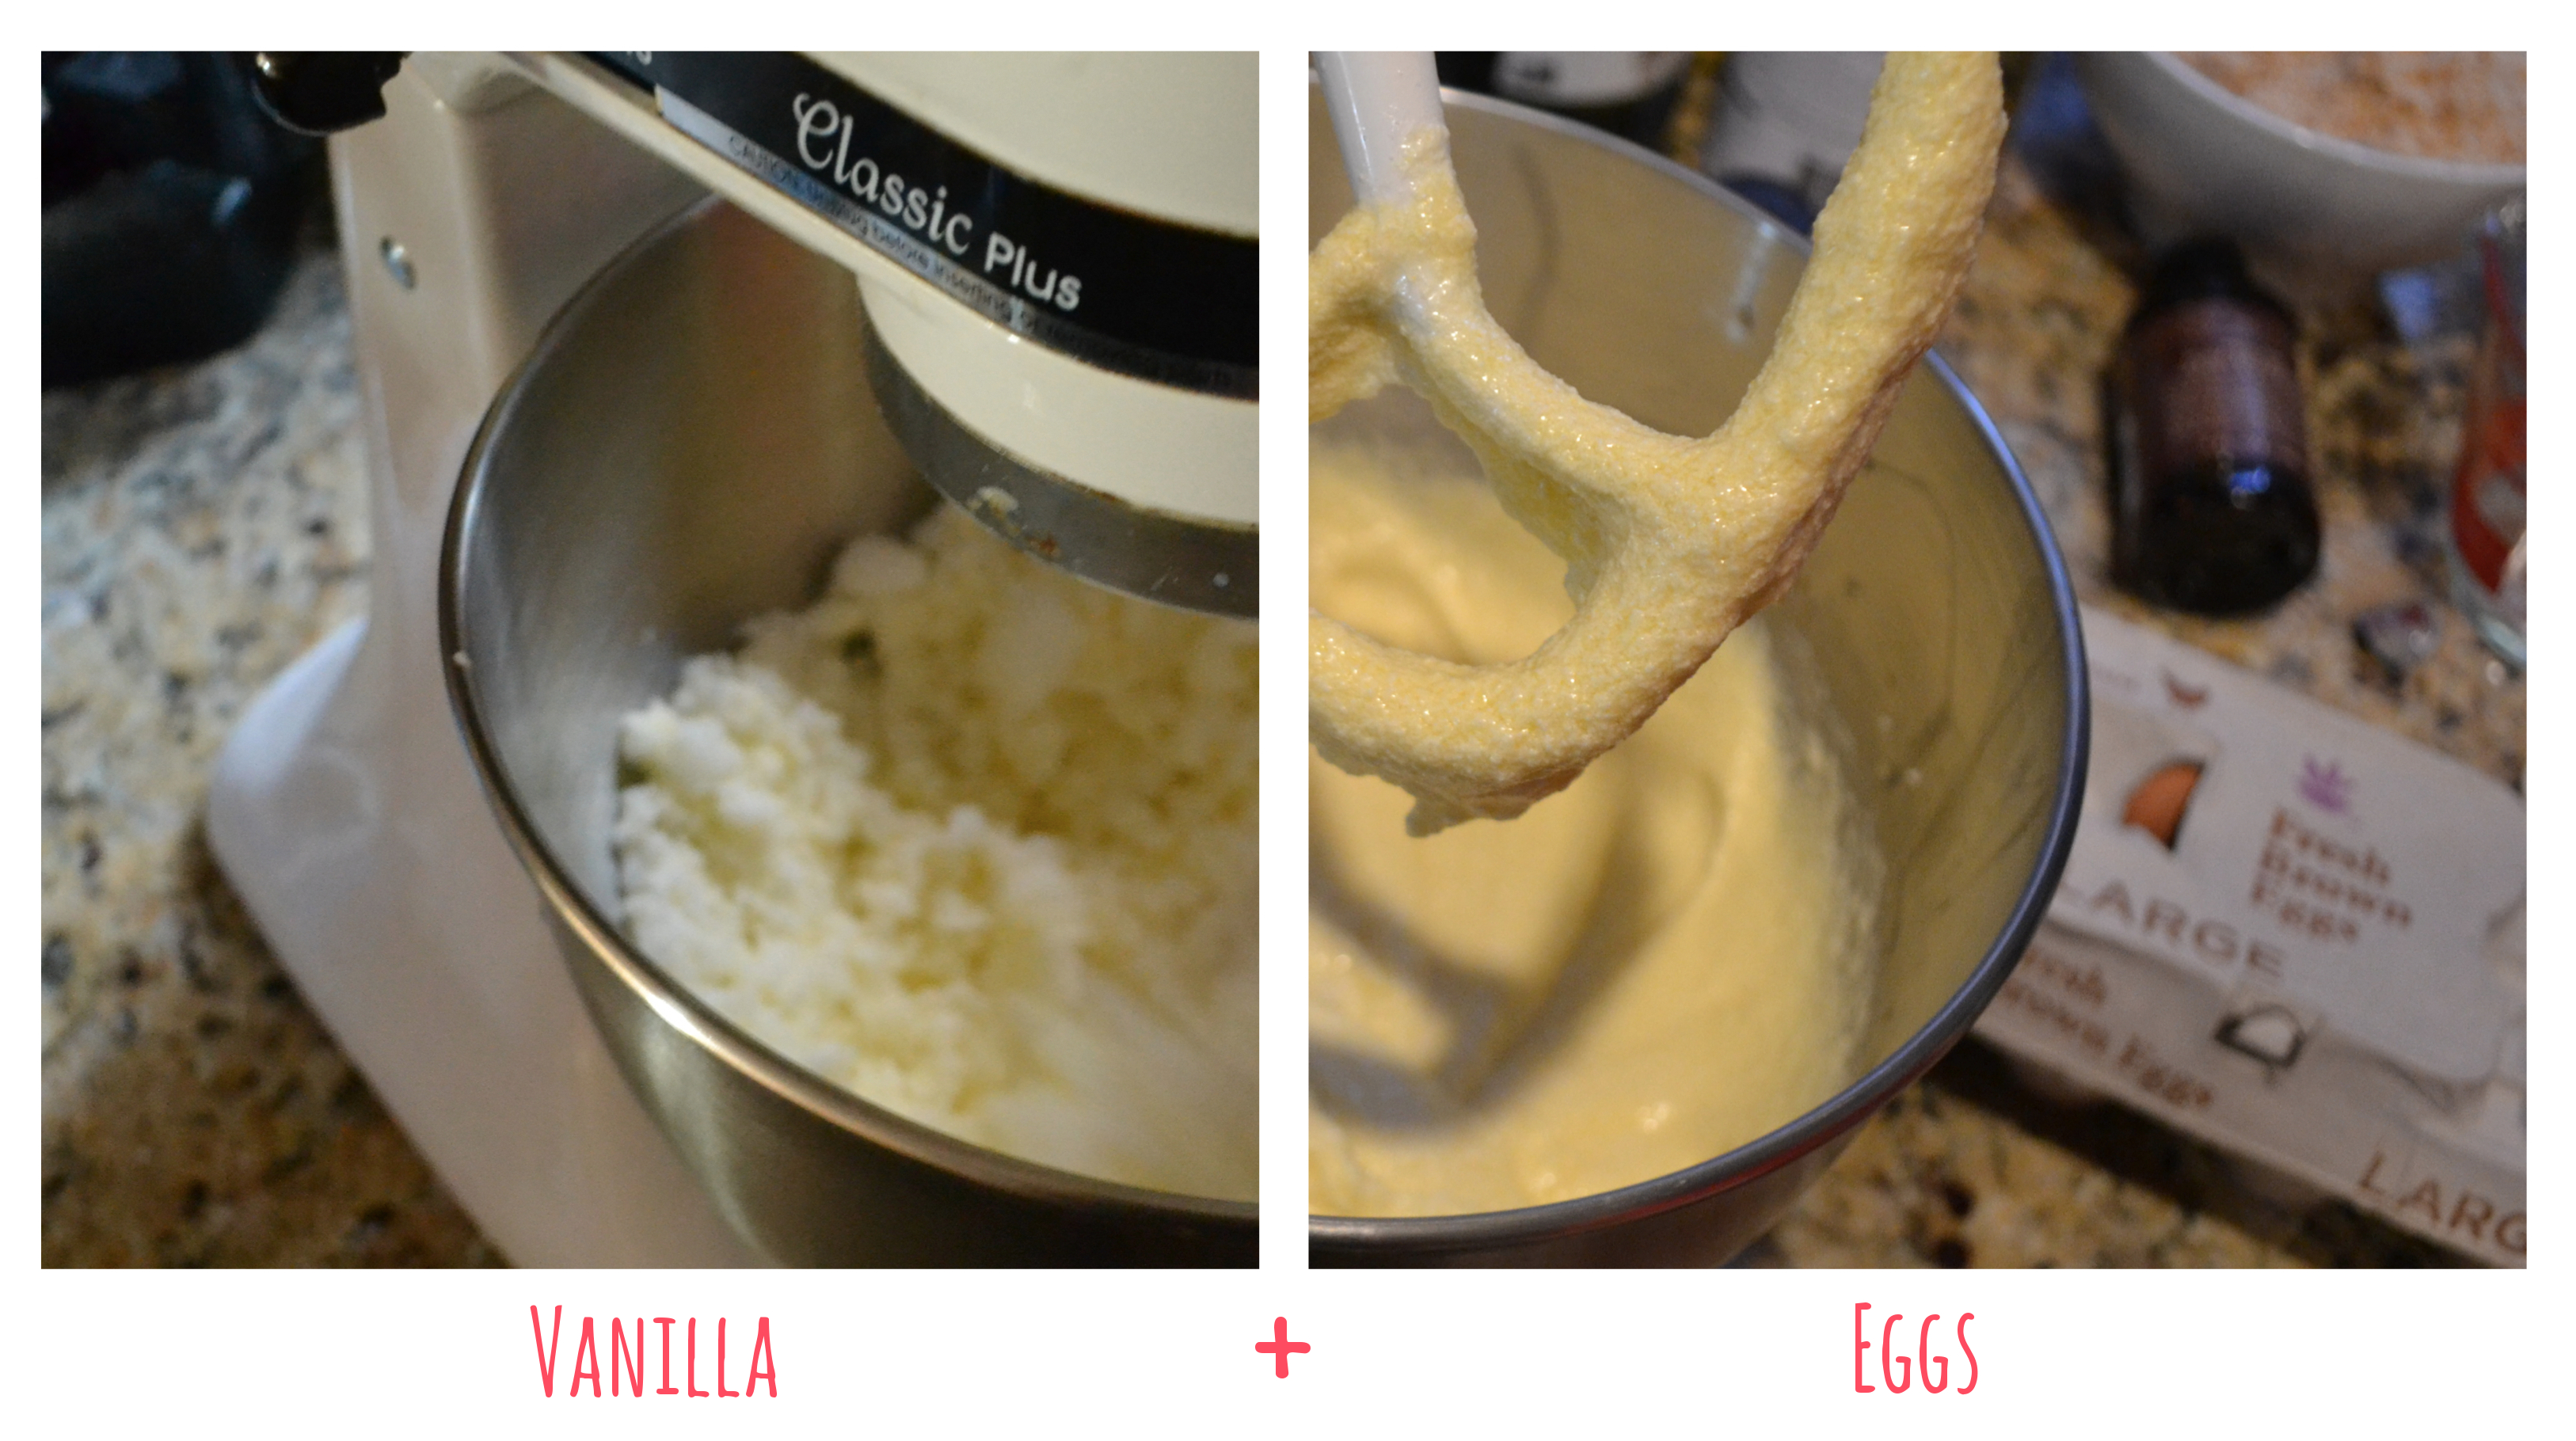
1 1/2 tbl vanilla
1 1/2 c sugar
8 eggs (6 full, 2 yolks)
*note: half & half is pictured, but I didn’t end up using any!
Start by preheating your oven to 400 then make your crust! Pulverize your graham crackers, melt your butter, & combine. Press your crumbs into the bottom of a 10-inch springform pan (already assembled). Pack your crumb crust in tight and use the back of a spoon to smooth it out. Bake for 10-12 minutes or until the crust begins to golden.
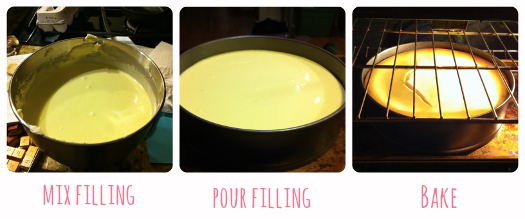
Turn your oven up to 500 and get working on your filling. Start by creaming your softened cream cheese with the paddle attachment of your mixer (it helps to cut the sticks in half). Cream for 3 minutes or so until the cream cheese is sufficiently soft. Add half of your sugar & keep mixing. Once that’s combined add the second half. Add your lemon & vanilla followed by the cup of sour cream. Keep mixing, mixing, mixing until everything’s smooth (being sure to frequently scrape the sides of your bowl). If you want to taste the filling, I recommend doing so now because your risk of salmonella poisoning is about to increase 8-fold! Now, los huevos! I had NO IDEA how many eggs go into a cheesecake! Sooooo many eggs! Count ’em e-i-g-h-t, delicious little pre-birds. Start by adding your two egg yolks and then procede to add your six whole eggs two at a time until everything’s combined. Give the sides of your bowl a few good scrapes and confirm everything’s combined. Your mix should be soupy, creamy, wonderful.
Put your crust pan on top of a cookie sheet (just in case) and pour your filling into the prepared crust. Pop into the oven and bake for 12 minutes at 500 before lowering the heat to 200. Check on your cake in an hour to see how it’s doing (but try your hardest to look and not touch…opening the door and changing the temperature of the oven even a little bit will increase its propensity to fall). Your cake will probably take ~an hour and a half to be sufficiently cooked. At this point, you might need to bite the bullet and give it a little poke. If everything seems like the appropriate cheesecake consistency (except maybe a little jiggle in the middle), shut off the oven and let the temperature fall while the cake cools. I left mine in the oven over night & plastic wrapped and popped it in the fridge the next morning.
I left my cake in at heat for a few minutes too long or opened the door too many times and it cracked (bummer!), but it was nothing a creative strawberry topping couldn’t cover. Remember when cakes give you cracks, get creative!
Say cheese!


