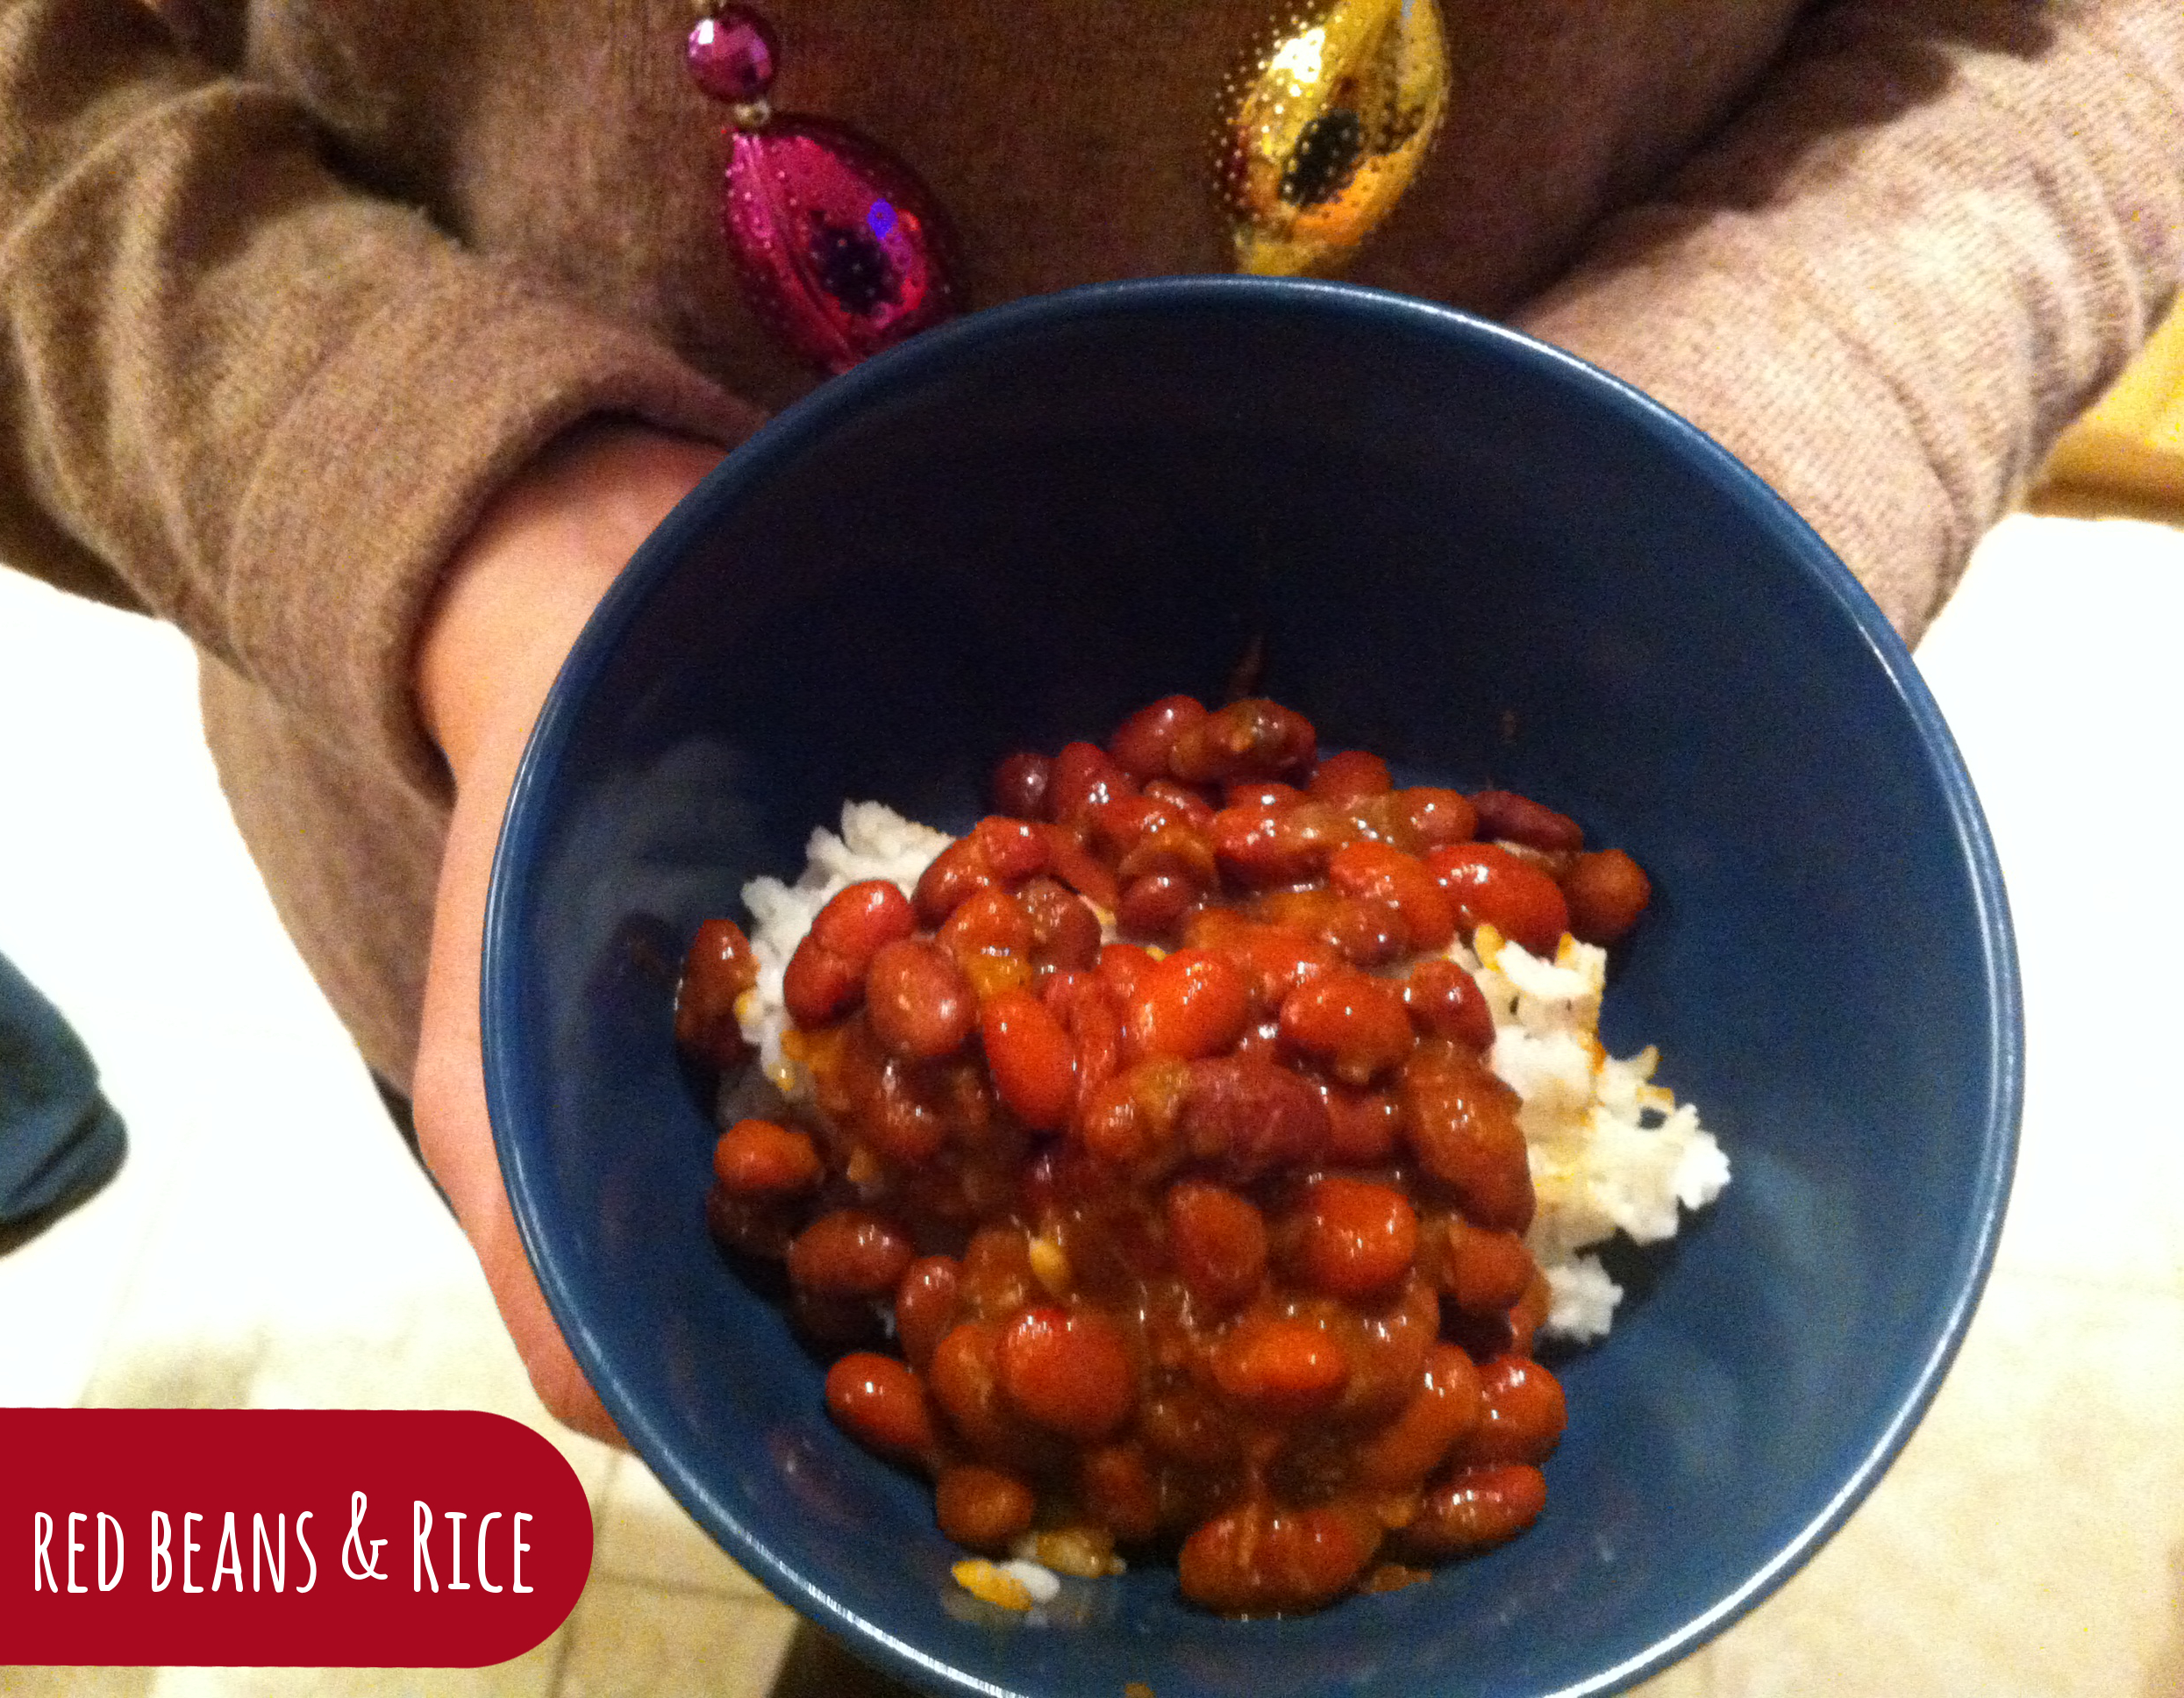
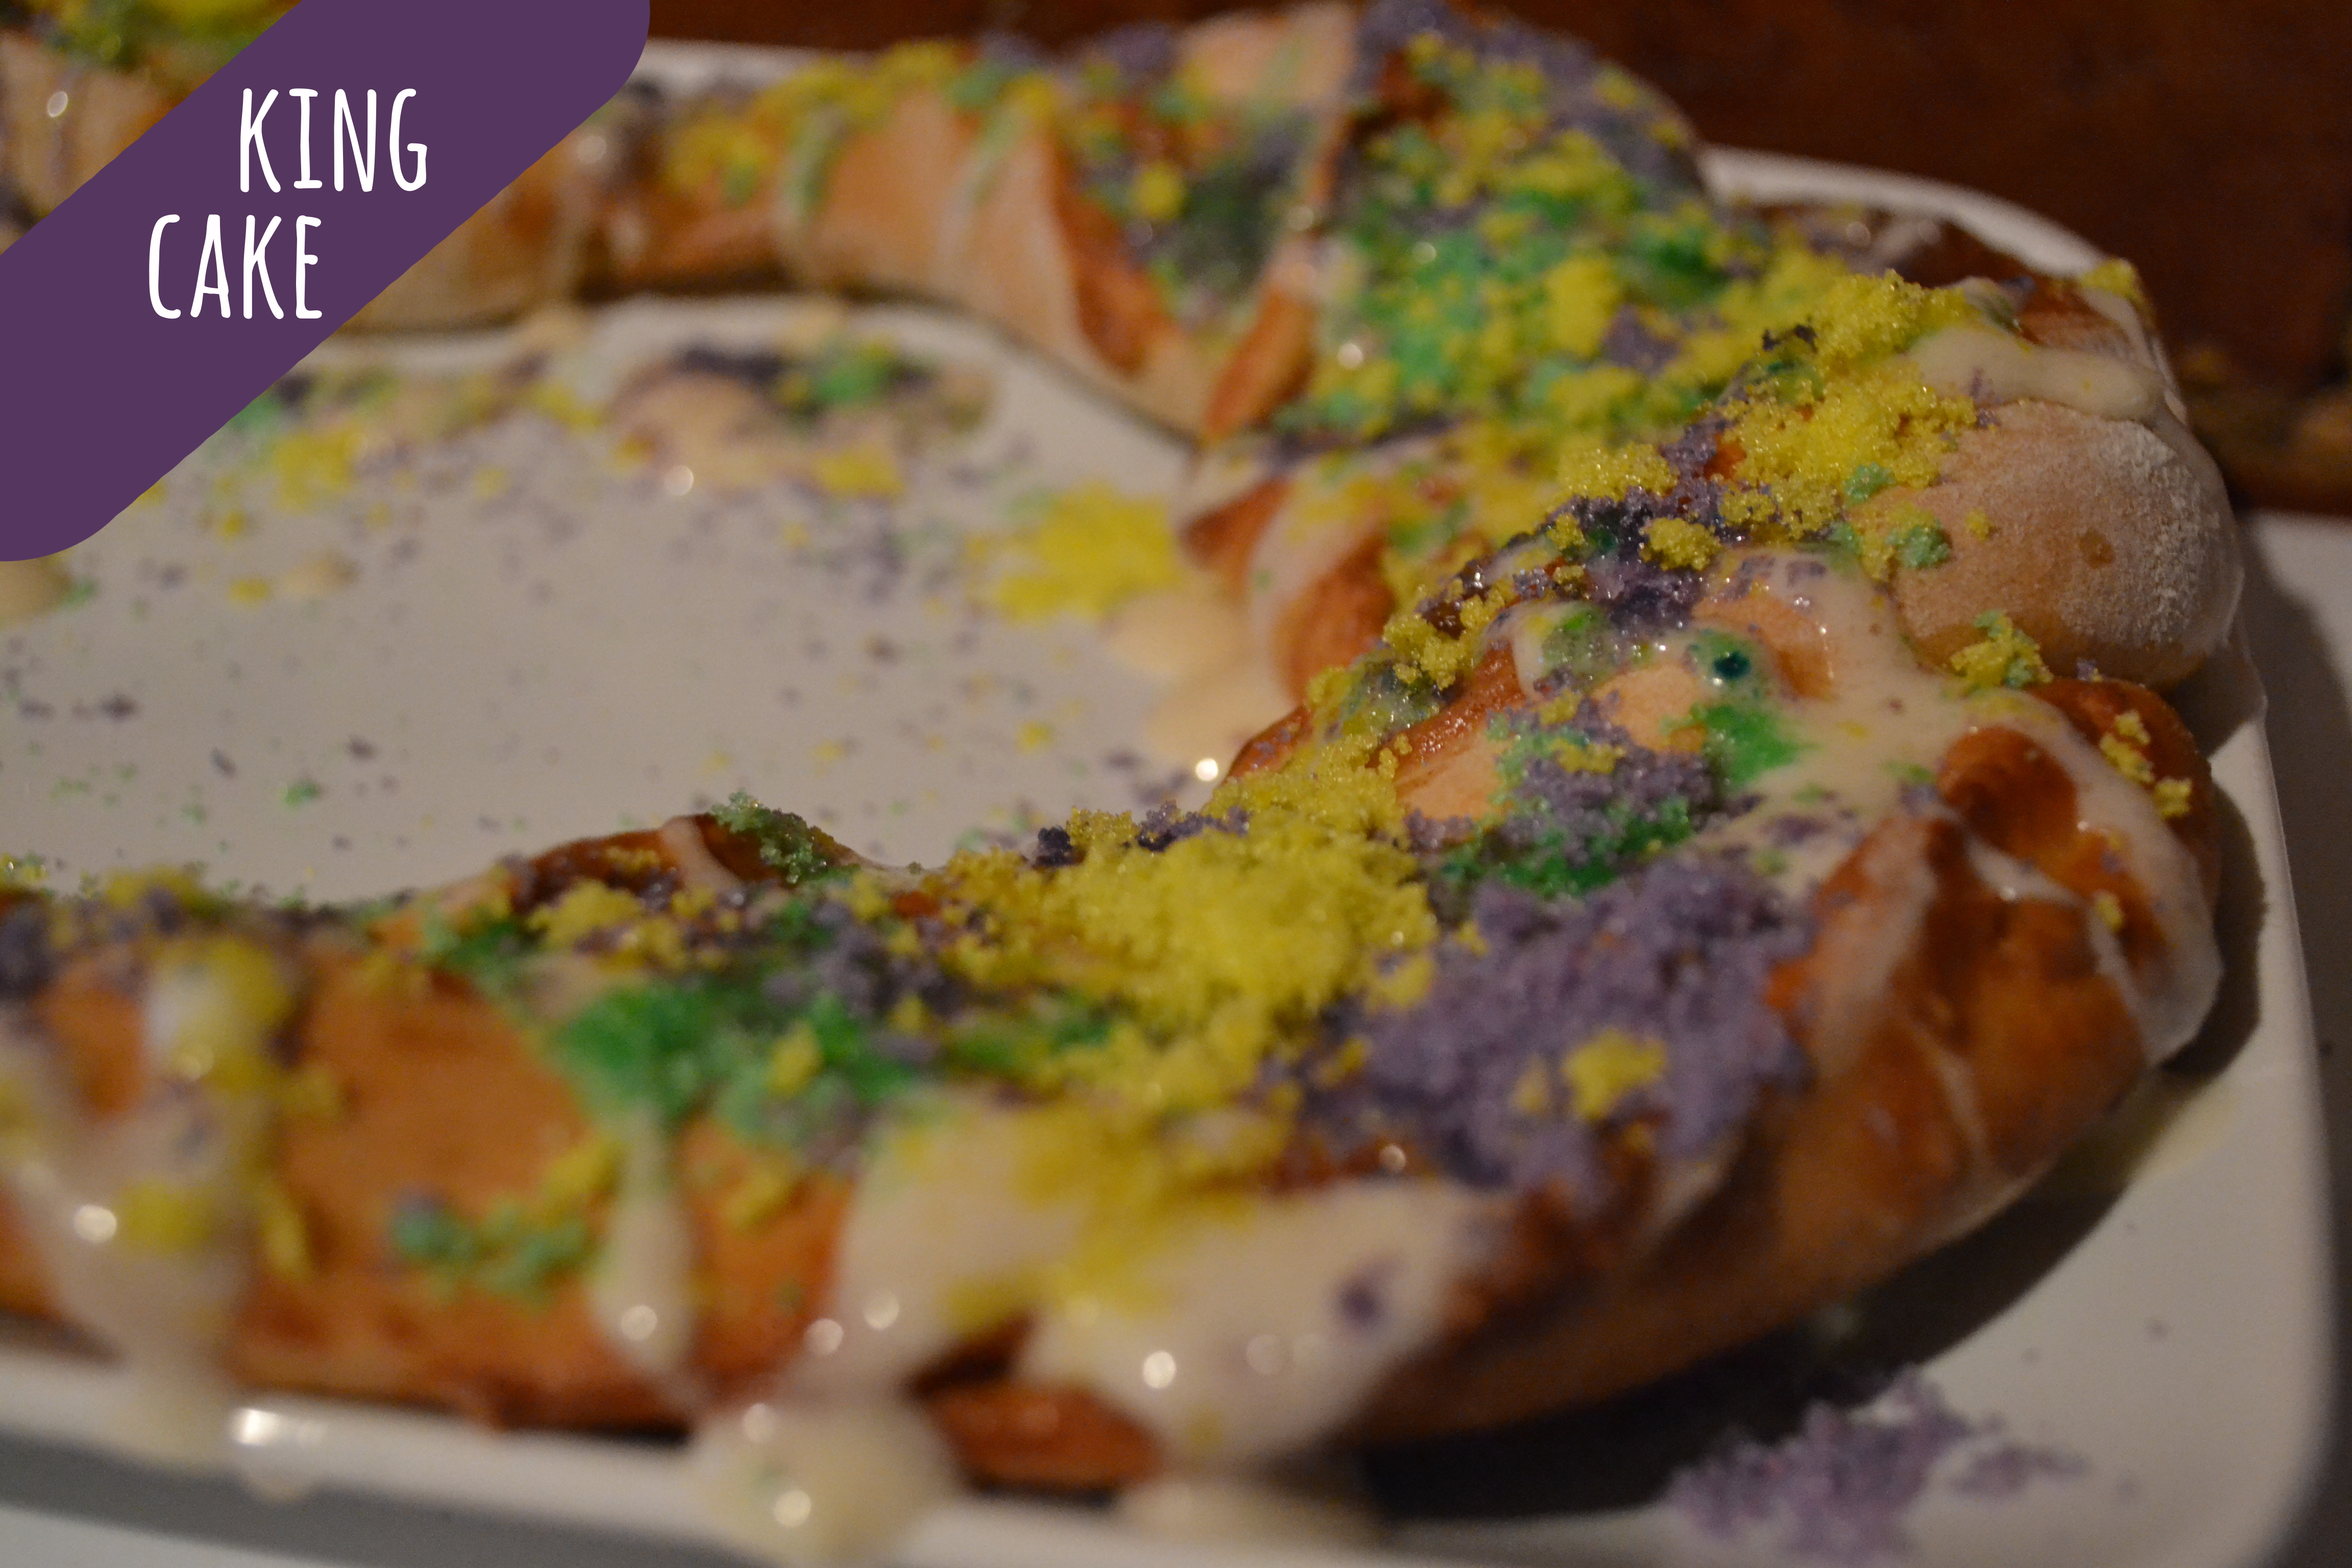
Sharing King Cakes during Mardi Gras season is a cherished Gulf Coast tradition, but it wasn’t until college that I realized King Cake folklore isn’t universal. Jaws dropped when I explained there’s a prized baby Jesus baked inside! There are competing interpretations of what it means to eat the slice with the baby. In some circles, he or she who finds the baby is declared King or Queen for the day while in others finding the baby means bringing the King Cake next Mardi Gras. Any way you slice it, King Cakes are fun for all. Even if you don’t buy the King Cake superstitions, who can object to a giant, glorified cinnamon roll? Not us!
A homemade King Cake isn’t the easiest feat, but you should try it once! Especially if you’re nowhere near the third coast.
You’ll need:
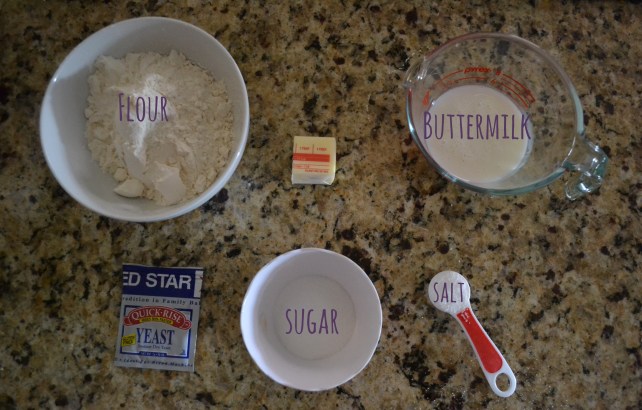
Dough
3 tablespoons sugar
1 teaspoon salt
2 tablespoons butter
1 1/3 cup plus 1 tablespoon unbleached all-purpose flour
1 teaspoon instant yeast
1/2 cup buttermilk

Cinnamon Filling
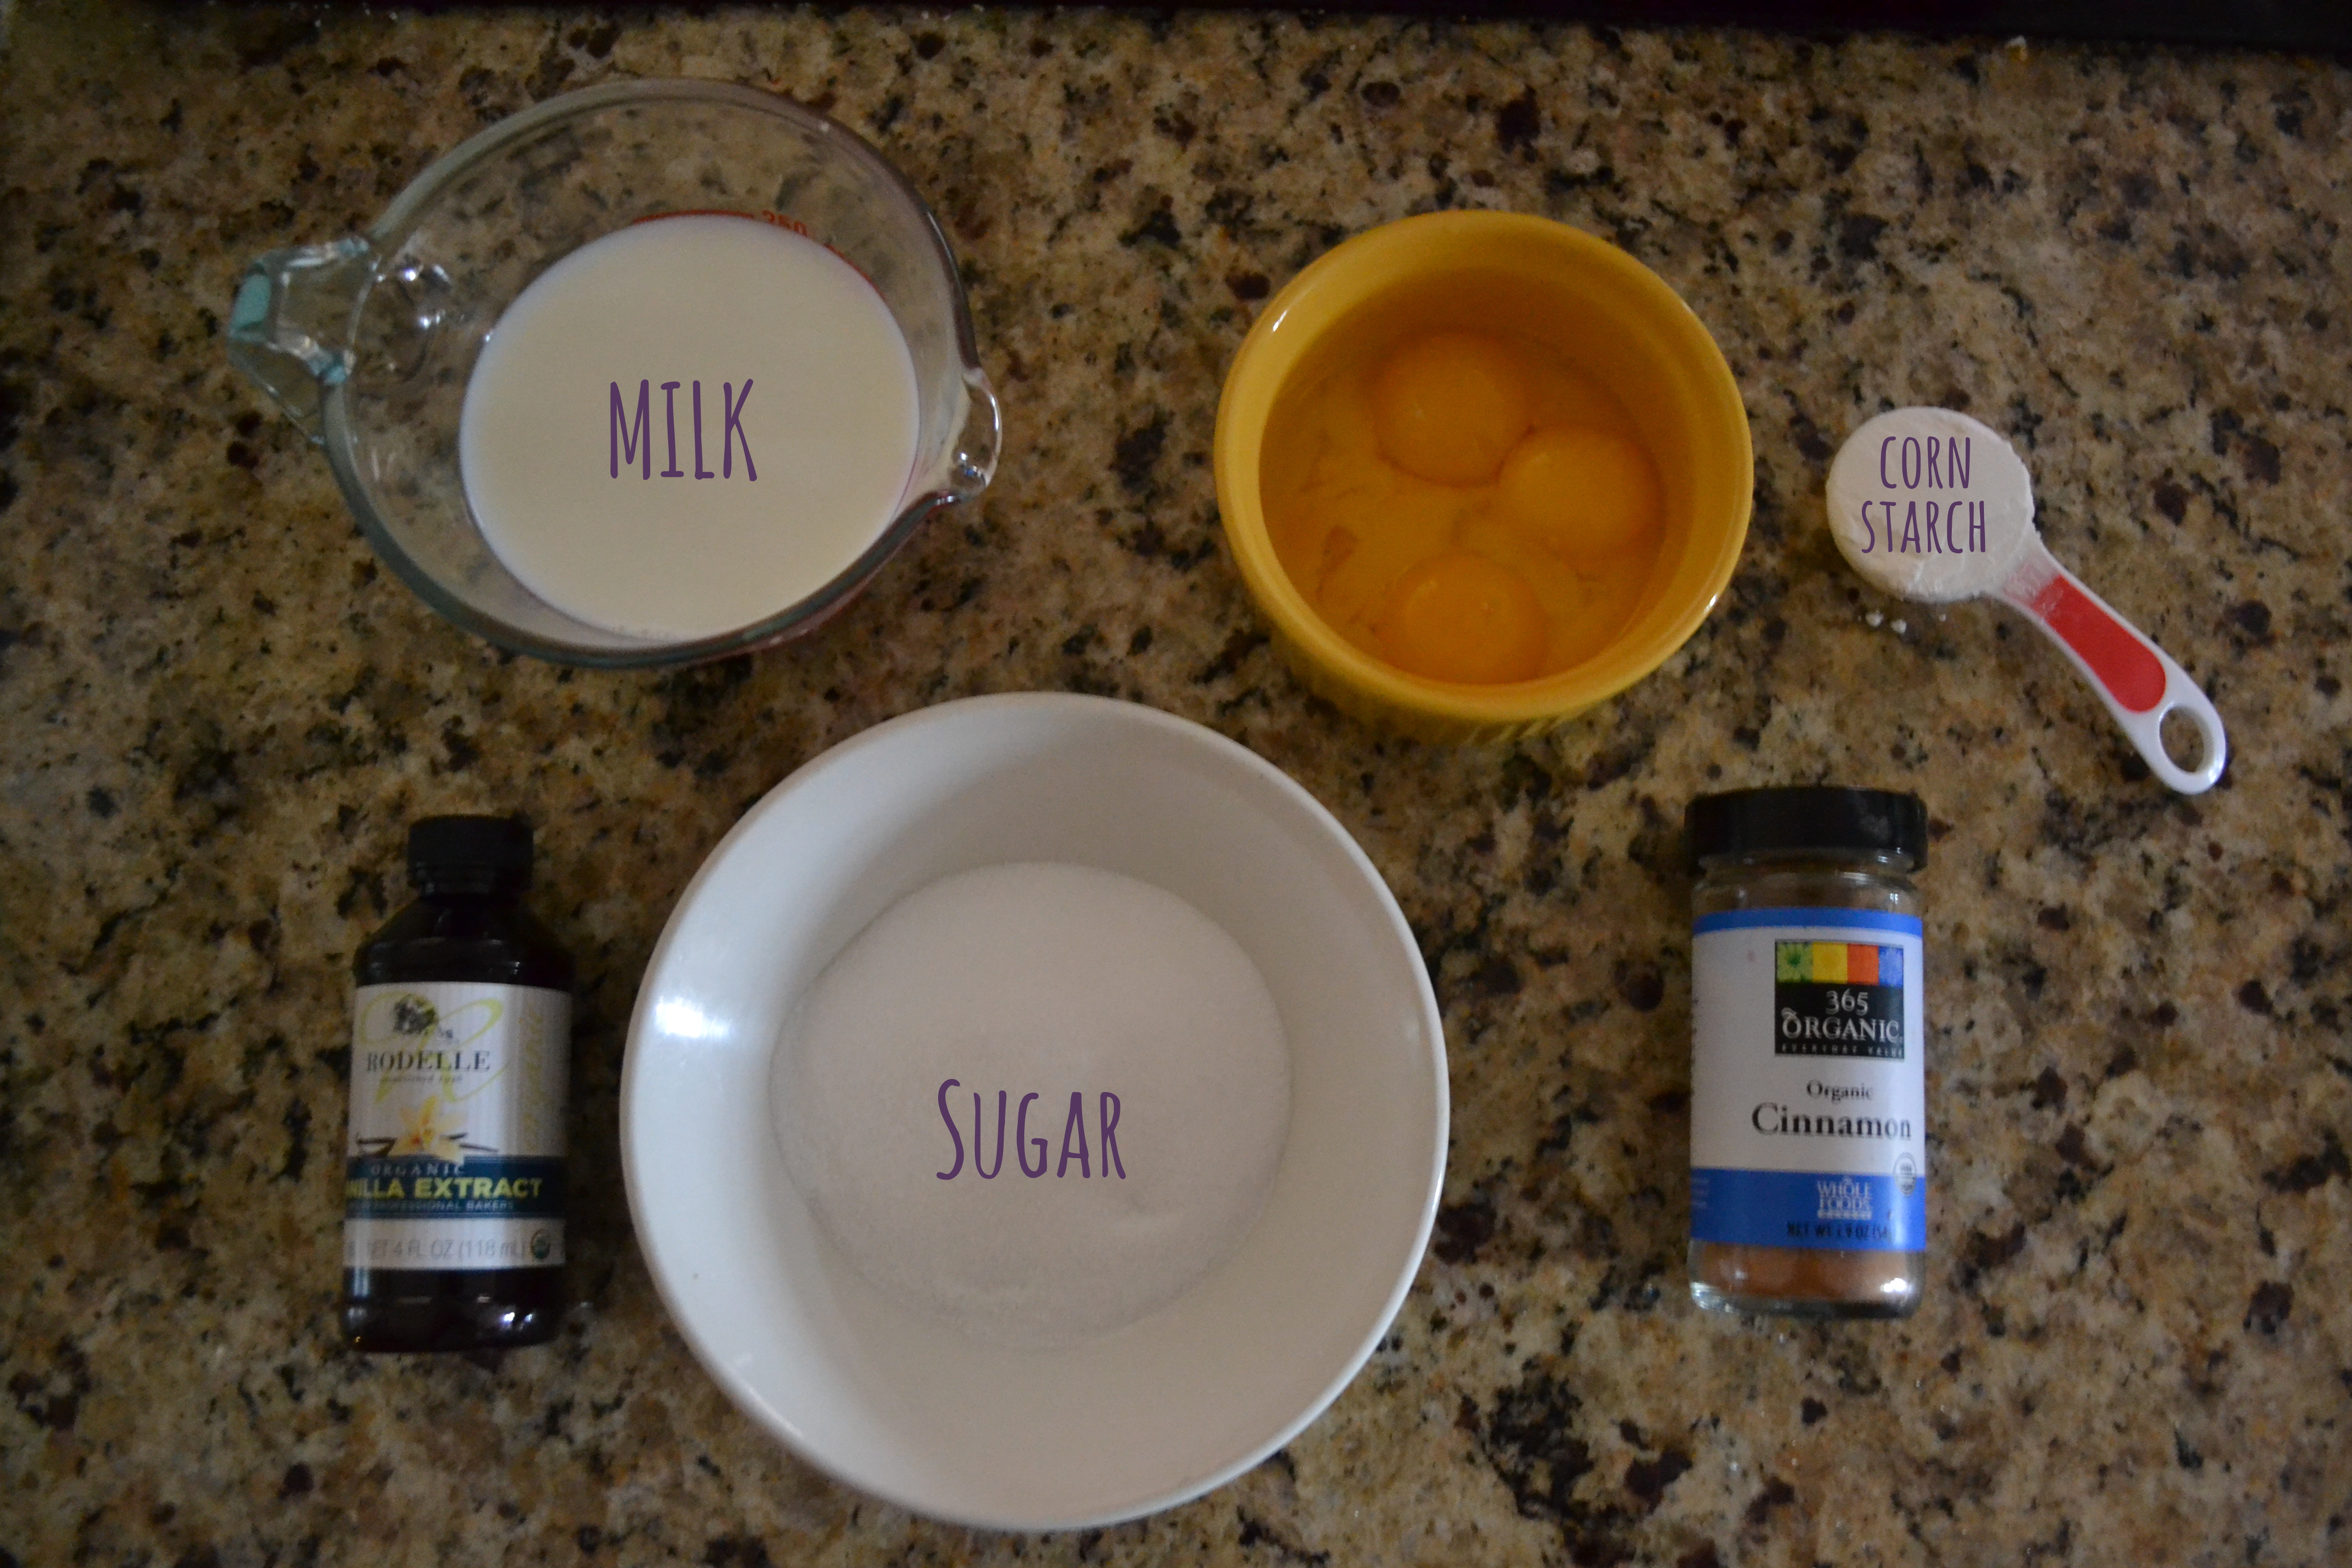
1 cup milk
1/4 cup granulated sugar
1 tablespoon cornstarch
5 yolks
1 teaspoon vanilla extract
1 tablespoon ground cinnamon
1/4 cup granulated sugar
Cinnamon Sugar
1/2 teaspoon cinnamon
2 tablespoons granulated sugar
2 tablespoons raw sugar
Icing
1 cup powdered sugar
2 ounces cream cheese
1 teaspoon milk
1/2 teaspoon vanilla extract
pinch salt
purple, green and gold colored sugars for garnish
traditional King Cake baby, penny, or trinket
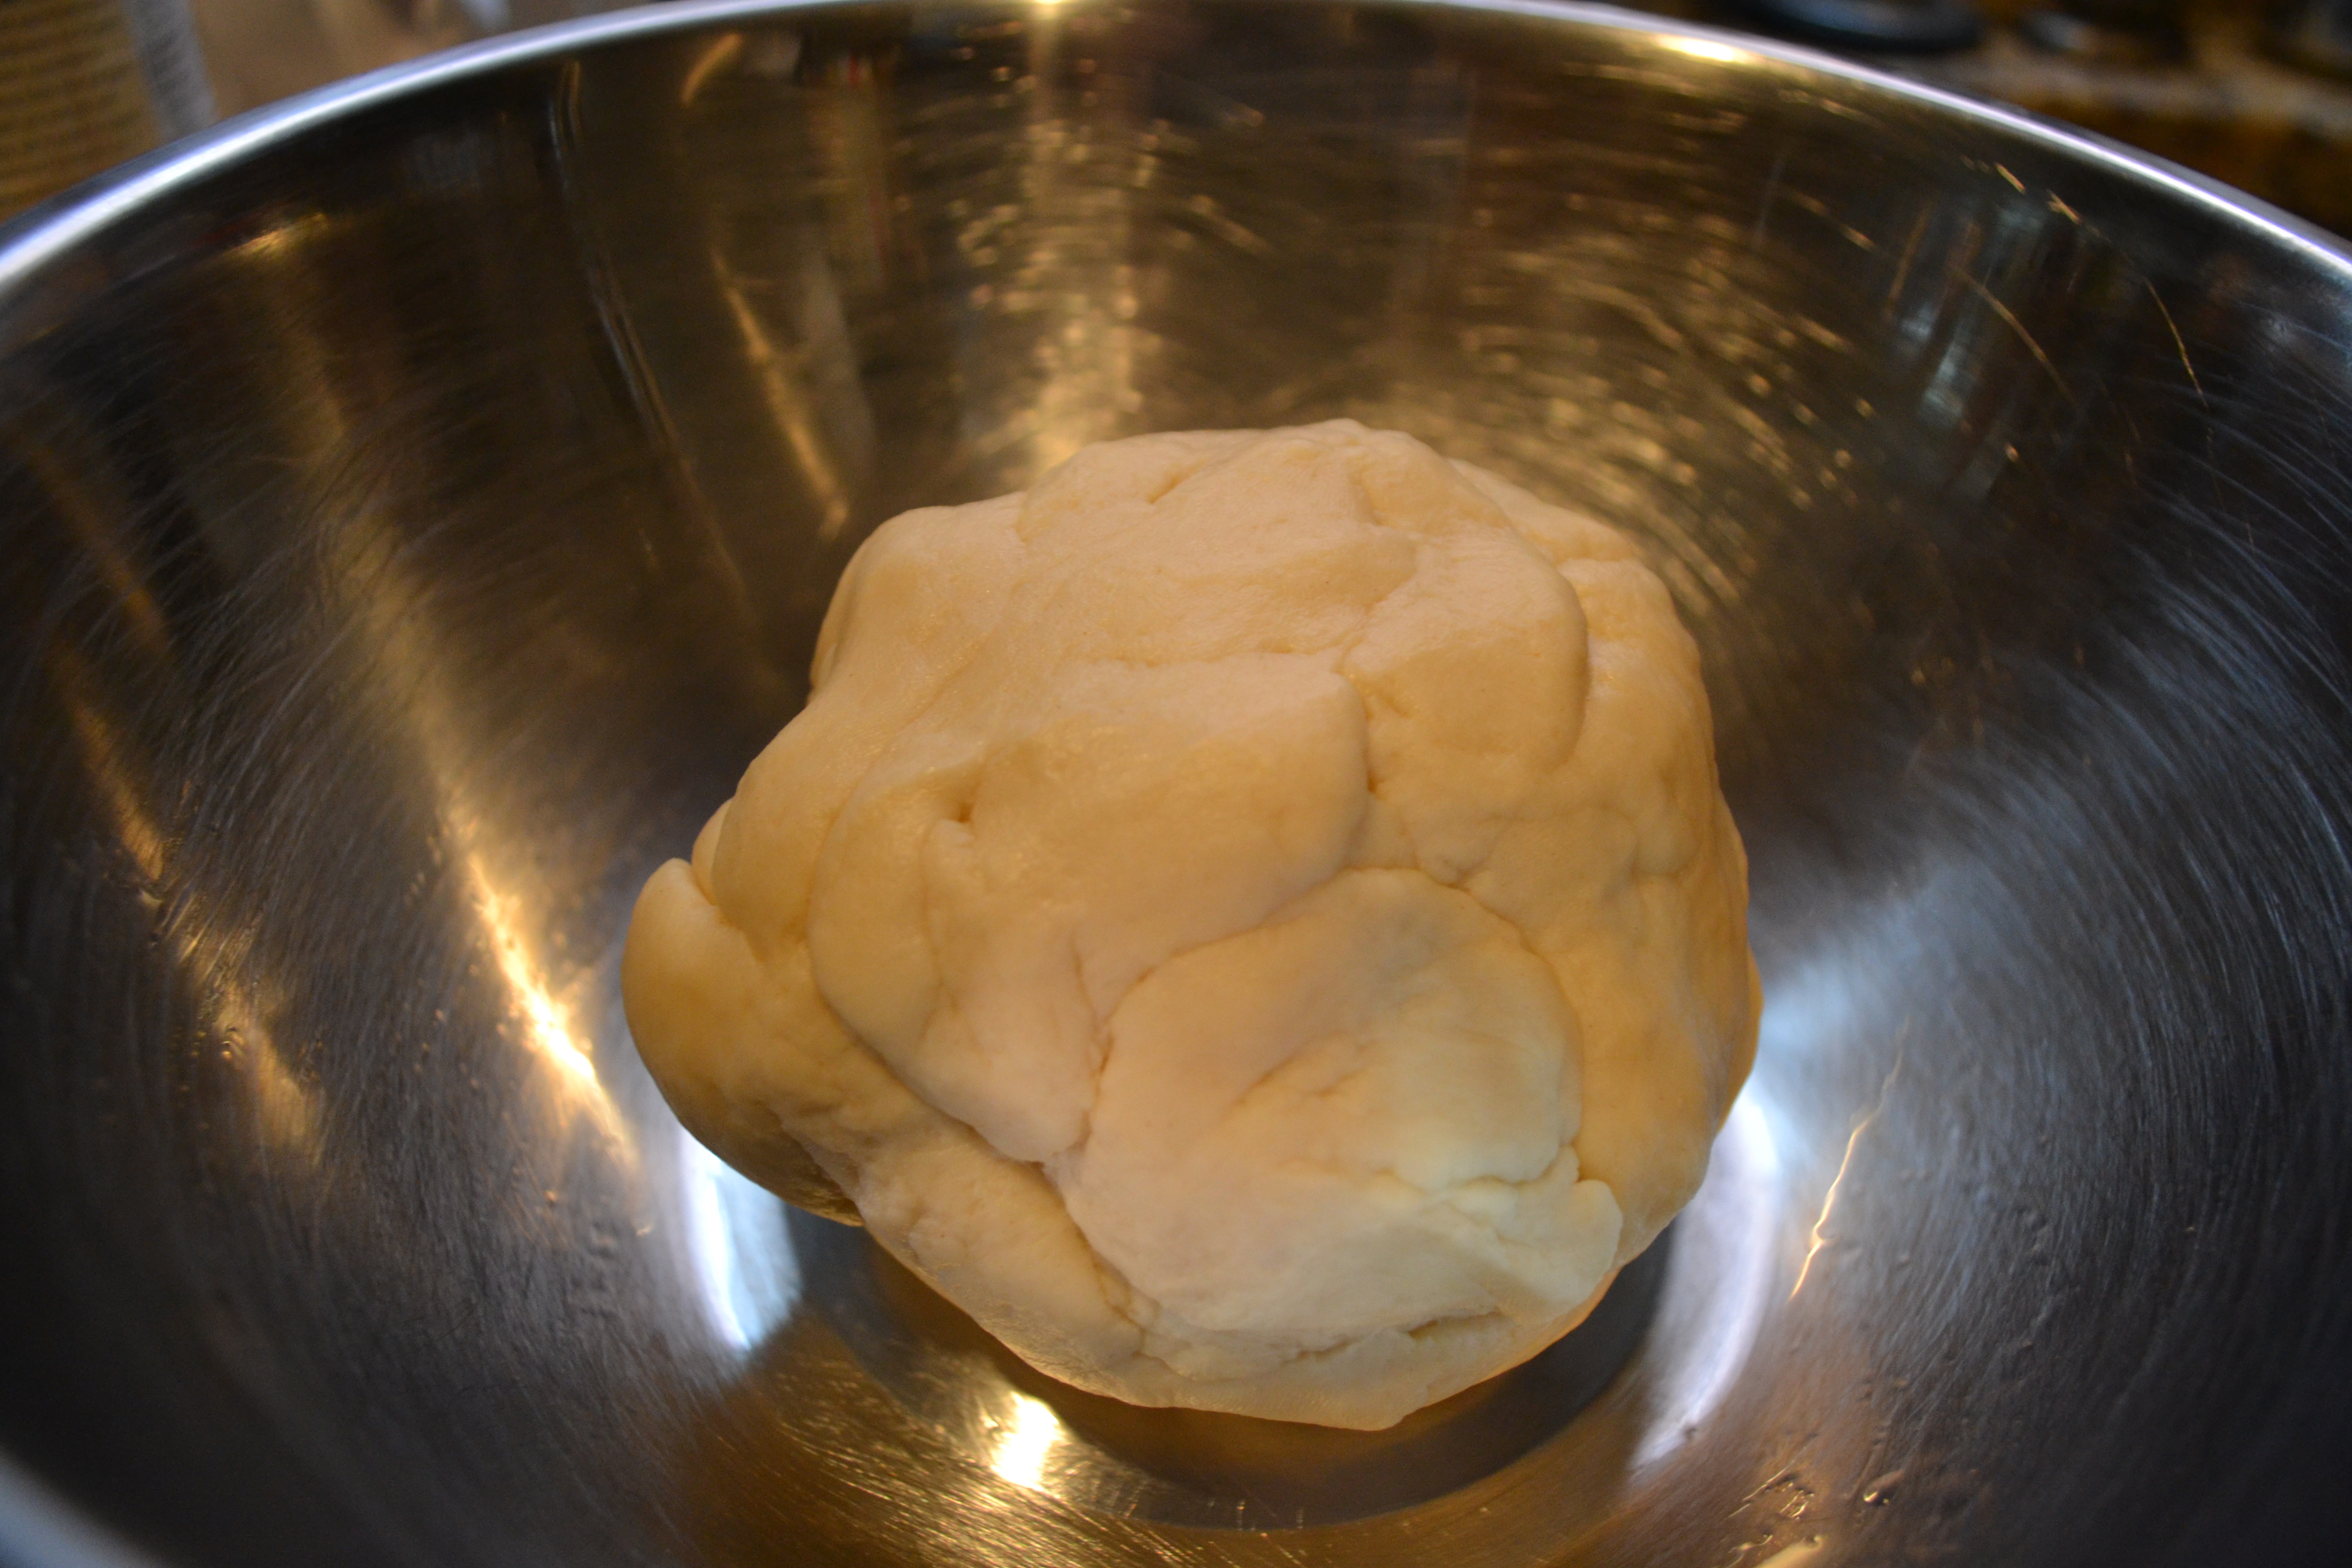
Start by making the dough. Combine all ingredients in the bowl of a stand mixer & mix for 15 whole minutes. I know this seems like a crazy long time, but alas! it works and your dough will be a silky ball after 15 whole minutes. Transplant your ball into a greased bowl covered with plastic wrap and leave to proof for ~2 hours. Note: your dough would be much happier proofing in an environment resembling the Gulf Coast (~80 – 90 degrees) than a drafty DC kitchen, but we made do!

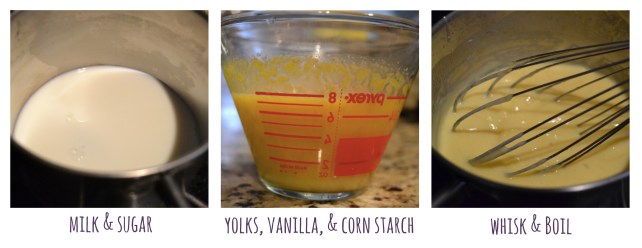
While your dough is proofing, make your filling. To make your cinnamon filling, start by combining your milk & sugar in a small saucepan. Stir rigorously to dissolve all the sugar. Once the milk & sugar mixture starts to boil, lower the heat slightly. Combine your cornstarch, vanilla, and egg yolks in a measuring cup & then add some of your warm milky mixture to the egg mixture (temper your eggs). Then, add your tempered eggs to the hot milk mixture, slightly elevate your heat, and continuously whisk your mixture until it begins to boil & the mixture resembles a thick custard. Remove custard from heat, cover & place in the fridge to chill. Once chilled, stir in cinnamon.
To make your cinnamon sugar mixture, combine all ingredients!
Once your dough is proofed, you get to play with it!

- flour your work surface
- flatten your ball of dough
- cut into two equal parts
- roll out each part into a rectangle
- spread your cinnamon filling liberally on each rectangle
- sprinkle your cinnamon sugar generously on each filling covered rectangle
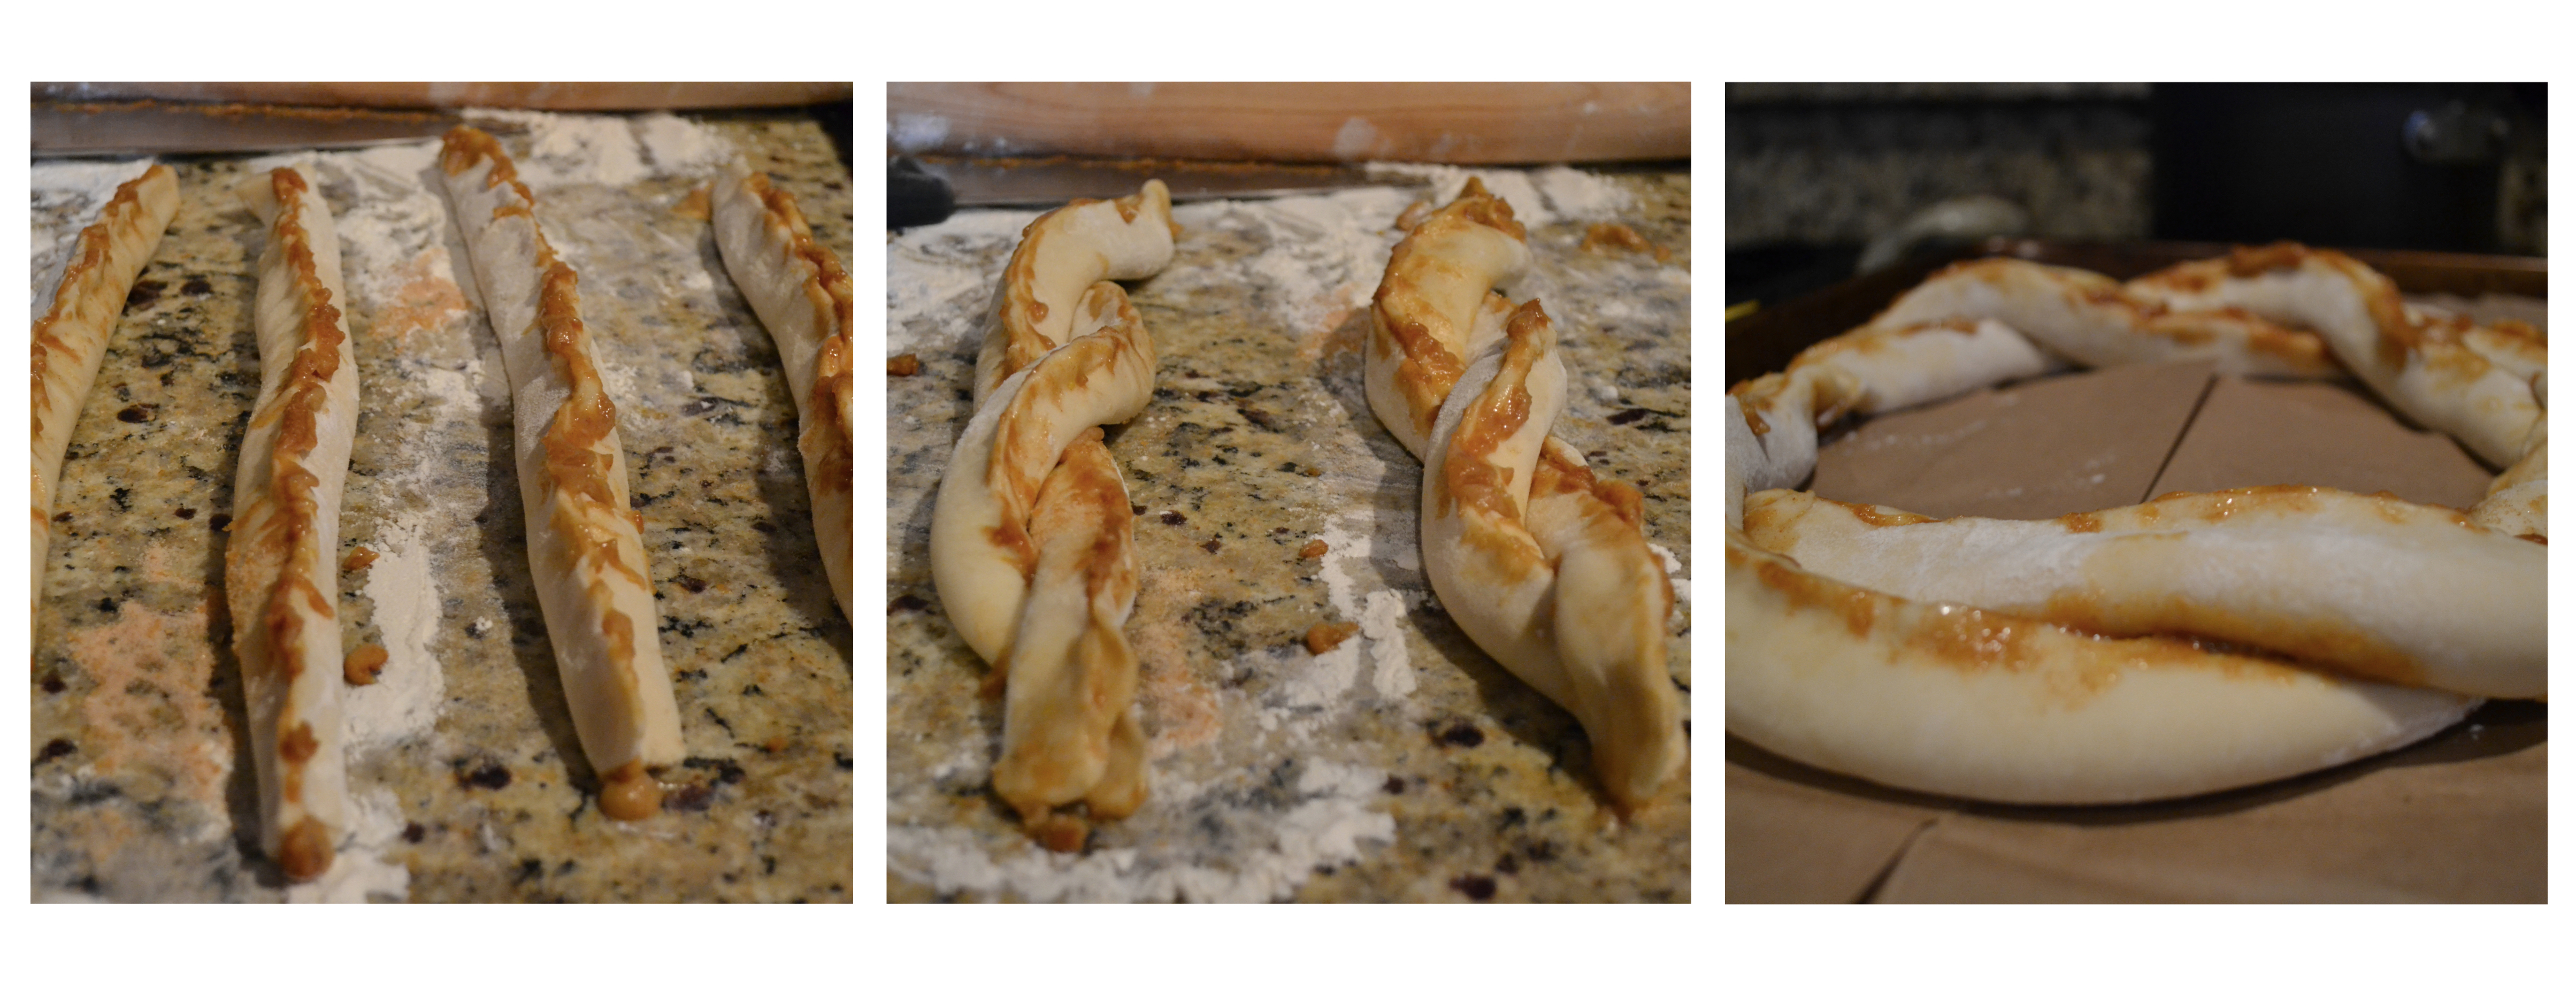
- cut each rectangle in half (hot dog-style)
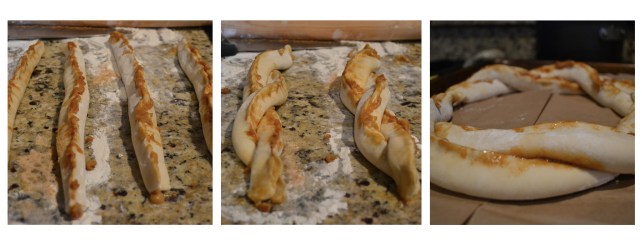
- roll each rectangle pinching the seems to form a cinnamon-filled snake
- braid your cinnamon-filled snakes so that you have two braids
- place braids on a parchment lined baking sheet & pinch ends of each braid with the other braid’s end until you have a circle
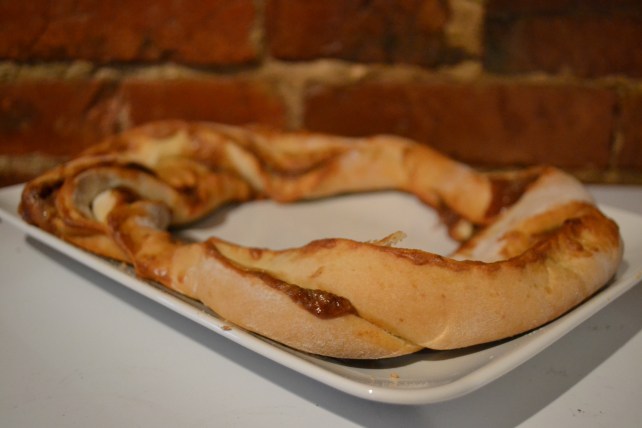
Now leave this to rise. Should rise for 90 minutes to 2 hours, although mine didn’t get greatly larger in size (it should double!).
Bake at 350 degrees for 20-25 minutes or until golden brown!
To make your icing: cream cream cheese until soft, add powdered sugar, milk, vanilla & pinch of salt. Add powdered sugar until your icing reaches desired consistency. I went with a thin icing to drizzle over my cake through the tip of a Ziploc turned piping bag.
Once your cake cools, drizzle with icing and decorate with yellow, green, and purple colored sugars (you can make these yourself with a few tablespoons of sugar and a few drops of food coloring!). If your trinket’s plastic and could easily melt, we recommend slipping it into a seam after your cake has cooled. If you’re using something heartier like a penny, you could pop it in before your cake goes in the oven. To each her own!
laissez les bon temps rouler,
HungryTexans